Custom Authentication
To develop custom authentication, you need to understand the authentication process. Below is the workflow from the launcher login to the response on your website.
How Authentication Works
- The user enters their username and password in the launcher.
- The launcher sends a request to your authentication server.
- The server verifies the credentials and sends a response.
- The launcher processes the response and grants or denies access.
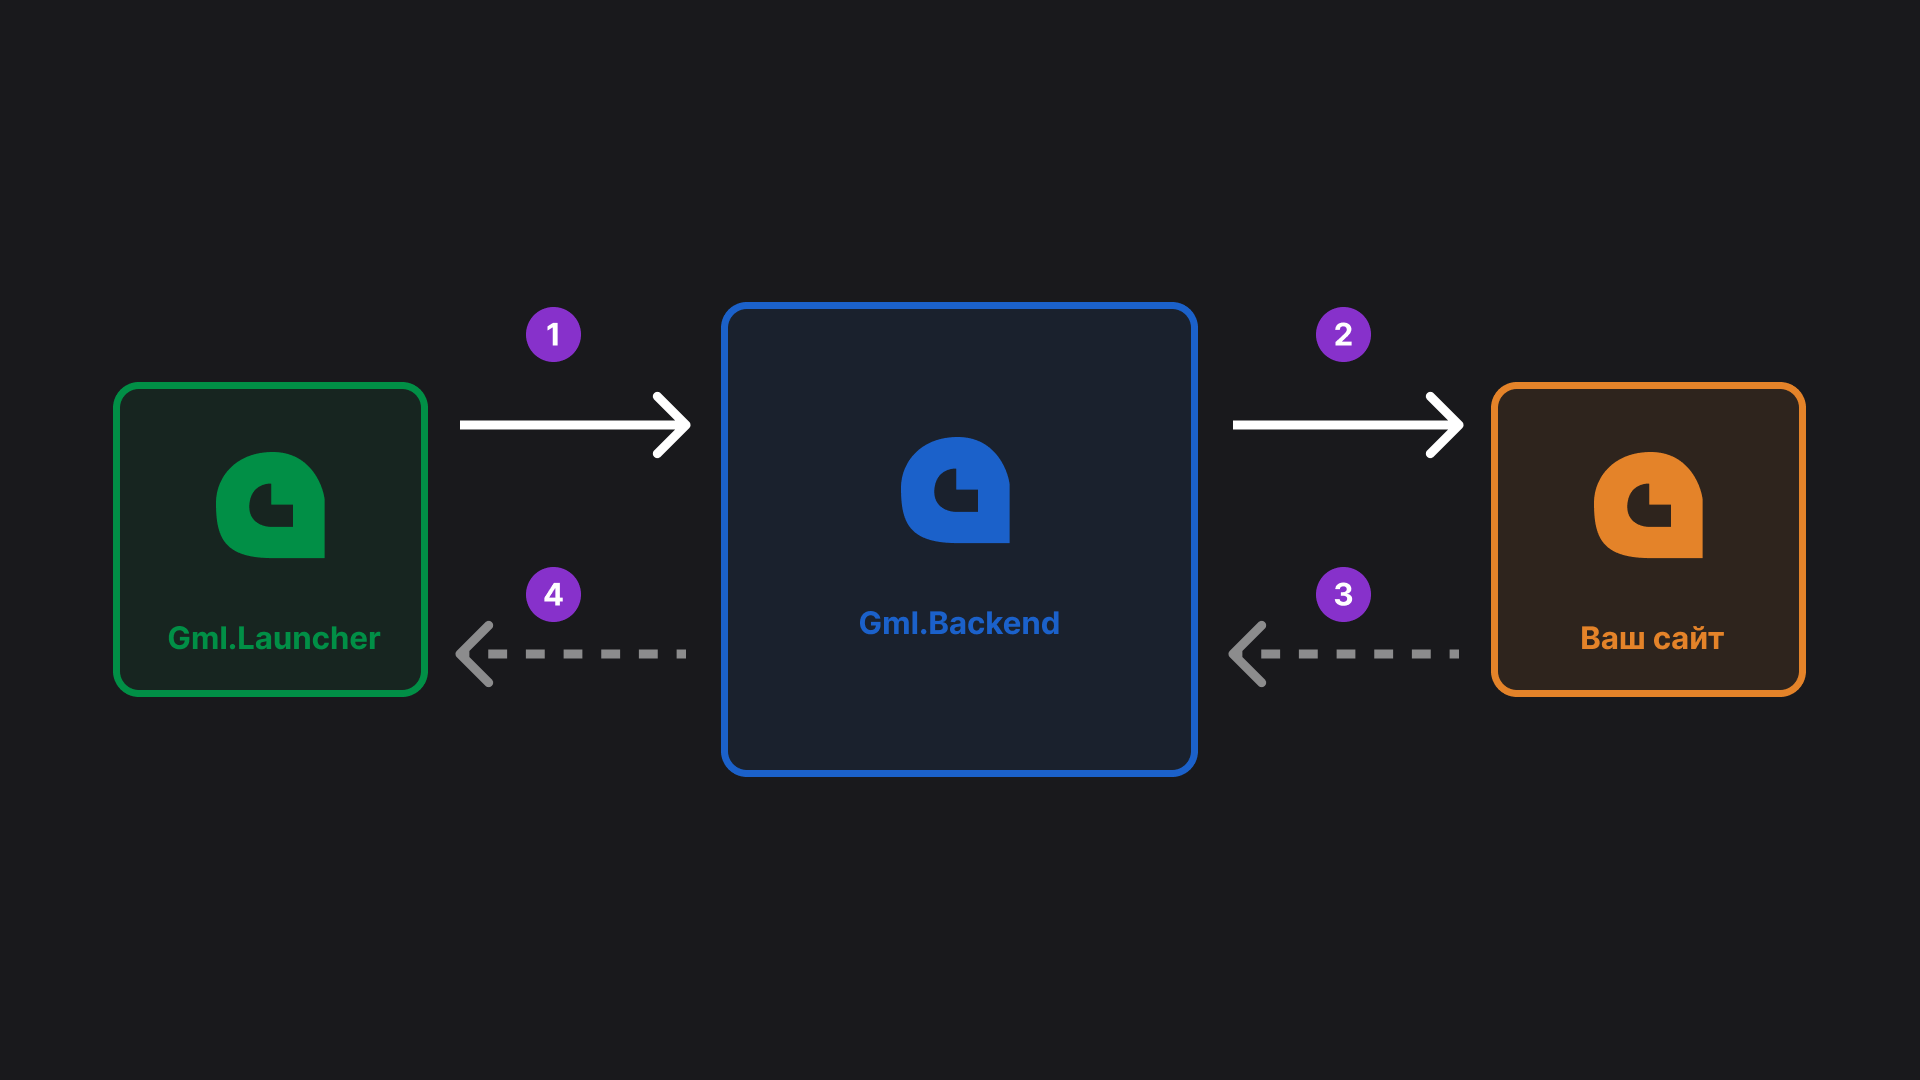
The image shows 4 stages of request flow. Here is the description of all 4:
- Request from the launcher to Gml.Backend
- Curl
- JavaScript
curl
--location 'http://localhost:5003/api/v1/integrations/auth/signin' \
--header 'Content-Type: application/json' \
--data '{
"Login": "USERNAME",
"Password": "PASSWORD",
"2FACode": "2FA_CODE"
}'
const myHeaders = new Headers();
myHeaders.append("Content-Type", "application/json");
const raw = JSON.stringify({
"Login": "USERNAME",
"Password": "PASSWORD",
"2FACode": "2FA_CODE"
});
const requestOptions = {
method: "POST",
headers: myHeaders,
body: raw,
redirect: "follow"
};
fetch("http://localhost:5003/api/v1/integrations/auth/signin", requestOptions)
.then((response) => response.text())
.then((result) => console.log(result))
.catch((error) => console.error(error));
- Gml.Backend → Your Website
- Curl
- JavaScript
- Example Response
curl --location 'http://YOUR_ADDRESS' \
--header 'Content-Type: application/json' \
--data '{
"Login": "USERNAME",
"Password": "PASSWORD",
"Totp": "2FA_CODE"
}'
const myHeaders = new Headers();
myHeaders.append("Content-Type", "application/json");
const raw = JSON.stringify({
"Login": "USERNAME",
"Password": "PASSWORD",
"Totp": "2FA_CODE"
});
const requestOptions = {
method: "POST",
headers: myHeaders,
body: raw,
redirect: "follow"
};
fetch("http://YOUR_ADDRESS", requestOptions)
.then((response) => response.text())
.then((result) => console.log(result))
.catch((error) => console.error(error));
200 - Successful authentication *
{
    "Login": "GamerVII",
    "UserUuid": "c07a9841-2275-4ba0-8f1c-2e1599a1f22f",
    "IsSlim": true,
    "Message": "Authentication successful"
}
401 - Authentication error *
{
    "Message": "Invalid username or password"
}
401 - Authentication error, 2FA required **
{
    "Message": "Enter 2FA verification code"
}
404 - User not found
{
    "Message": "User not found"
}
403 - User blocked or no access
{
    "Message": "User is blocked. Reason: Spawn giveaway"
}
* Note: It is not mandatory to return a body, returning the StatusCode is enough (Required).
The Message and UserUuid fields are generated automatically.
Endpoints 200 and 401 must be implemented Mandatory.
** If you want to check two-factor authentication codes, the "Enter 2FA verification code" message is Required.
Custom Authentication
You can implement your own custom authentication via an Endpoint. You need to implement a Web API Endpoint on your service.
- Go to the control panel:
Integrations→Authentication→Authentication→Custom Authentication - Paste the URL of your implemented authentication endpoint (Gml.Backend → Your Website).
Important: Example implementations can be found on GitHub